5 Easy Ways to Clean Panini Grill for a Longer Life
Key Panini Grill Cleaning Hacks: Use mild soap & water for light residues, baking soda & vinegar for tough stains, and soft brushes for a thorough clean.
Keeping your panini grill clean doesn’t have to be a daunting task. With the right hacks, you can tackle even the most stubborn residues, ensuring your appliance remains in top-notch condition.
Disclosure: As an Amazon Associate, this site earns from qualifying purchases. Thank you!
Essential Supplies for Cleaning Your Panini Grill
Keeping your panini grill in pristine condition doesn’t have to be a daunting task. With the right supplies on hand, you’ll find the process straightforward and effective. Let’s dive into the essential cleaning tools and solutions that will help maintain your grill’s performance and longevity.
Mild Dish Soap and Warm Water
Your go-to solution for a quick and efficient clean is as simple as mild dish soap and warm water. This duo works wonders in removing grease and light food residues without harming the non-stick surfaces of your panini grill. Start by mixing a few drops of dish soap with warm water in a bowl. Dip a soft cloth or sponge into the solution, and gently wipe down the grill plates after they’ve cooled down. This method not only cleans but also preserves the integrity of your grill’s surface.
Baking Soda and Vinegar Solution
When faced with stubborn stains and burnt-on cheese, turn to a reliable baking soda and vinegar solution. This potent mixture acts as a natural abrasive, perfect for tackling those hard-to-clean areas without scratching your grill’s surface. Mix 1 tablespoon of baking soda with 2 tablespoons of vinegar to form a paste. Apply it directly to the problem areas and let it sit for a couple of minutes. Then, using a soft-bristled brush or cloth, scrub gently to lift and remove the residue. This combination is particularly effective for deep-cleaning sessions.
Soft-bristled brushes or Sponges
Choosing the right tools for scrubbing your panini grill is crucial to avoid any damage. Soft-bristled brushes or sponges are your best bet for an effective clean that’s gentle on your appliance. These tools are flexible enough to get into the grooves and corners of the grill plates, ensuring a thorough clean without the risk of scratches. Whether you’re dealing with daily grime or the aftermath of a cheese melt disaster, a soft brush or sponge, combined with the above solutions, will have your grill looking and functioning like new.
Pre-Cleaning Steps: Safety First
Before diving into the nitty-gritty of cleaning your panini grill, it’s crucial to kick things off on the right foot by sticking to safety measures that protect both you and your appliance. Starting with these preliminary steps ensures an effective and hassle-free cleaning process.
Unplug and Allow Your Panini Grill to Cool
Safety should always be your top priority, so the first step is to unplug your panini grill. This might seem like a given, but it’s something that can be easy to overlook at the moment. After unplugging, give your grill sufficient time to cool down. Attempting to clean a hot grill not only poses a risk of burns but may also harm the unit’s nonstick surface. A cooled grill ensures that you can safely handle it and reduces the risk of any unintended damage.
Remove Any Removable Plates and Drip Trays
Next up, if your panini grill features removable plates or a drip tray, take them out. Doing so not only makes them easier to clean but also allows you to access and tackle crumbs and grease that have made their way into the nooks and crannies of your grill. Wash these components separately with warm, soapy water, or check if they’re dishwasher-safe for an even easier cleanup. This step ensures that every part of your grill gets the attention it needs, leading to a cleaner, more sanitary cooking appliance ready for your next gourmet pressed sandwich.
Cleaning Hacks for a Sparkling Panini Grill
Keeping your panini grill clean doesn’t just contribute to better-tasting sandwiches; it also extends the life of your appliance. Here are some proven hacks to get your grill sparkling again without much elbow grease.
The Steam Cleaning Quick-Fix
Sometimes, all it takes is a little steam. Heat your grill to its lowest setting, soak a cloth in water, wring it until it’s damp but not dripping, and lay it on the open grill. Let the steam work its magic for about 2-5 minutes. You’ll be amazed at how easily food residue wipes away after this. It’s a safe, effective method to loosen up grimy buildup.
Leveraging the Power of Baking Soda
For those times when you’re battling crispy bits and stubborn burnt cheese, baking soda is your best friend. Mix it with a little water to form a paste, then coat the problem areas on your grill. After letting it sit for a few minutes, take a cloth soaked in hot water and scrub. Baking soda is gentle on surfaces but tough on grime, making those greasy messes a thing of the past.
The Vinegar Solution for Stubborn Residues
Vinegar isn’t just great for salads—it’s also a powerful cleaning agent. Mix equal parts white vinegar and water, apply it to the grill, and let it sit for a few minutes. This solution is particularly effective for cutting through grease and removing stubborn residues. After the vinegar has done its job, a simple wipe-down should leave your grill looking like new.
The Hot Sponge Scrub Method
If you’ve stayed on top of grill cleanliness, sometimes a quick once-over with a hot, soapy sponge is all it takes. This method is especially useful for getting into the grill’s grooves and over its ridges. Make sure your sponge is non-abrasive to avoid scratching the non-stick surface, and you’ll find that even the most persistent pieces of food come away easily.
By incorporating these hacks into your cleaning routine, maintaining a clean and efficient panini grill is easy. Not only will your sandwiches thank you, but you’ll also be prolonging the life of your appliance one cleaning session at a time.
Deep Cleaning Techniques for Tough Residues
When your panini grill faces tough, burnt-on residues, regular cleaning methods may not suffice. Here’s where deep cleaning techniques come into play, specifically designed to tackle those stubborn spots without damaging your grill.
Utilizing a Plastic Spatula for Scraping
Before reaching for abrasive materials, a simple plastic spatula can be your first line of defense against tough residues. Here’s how you do it:
- Wait for the grill to cool down but is still slightly warm. This makes the residue easier to remove.
- Gently scrape off the burnt bits using a plastic spatula. Emphasis on gentle; you want to avoid scratching the surface.
- Wipe away the loosened debris with a damp cloth or sponge.
By using a plastic spatula, you can effectively remove crusty, burnt-on food from your grill’s surface without introducing scratches, keeping it in pristine condition.
The Chopstick and Cloth Trick for Narrow Spaces
For the nooks and crannies that are too narrow for any scrubber or spatula, try the chopstick and cloth trick:
- Wrap the wide end of a wooden chopstick with a damp, soapy cloth.
- Carefully insert the wrapped chopstick into the groove or corner where the residue is stuck.
- Move it gently back and forth to dislodge the burnt-on bits.
This method is especially effective for cleaning without risking damage to your panini grill’s nonstick surface. It’s simple yet efficient for getting into those hard-to-reach spots, ensuring your grill is thoroughly clean and ready for its next use.
Maintaining Your Panini Grill Post-Clean
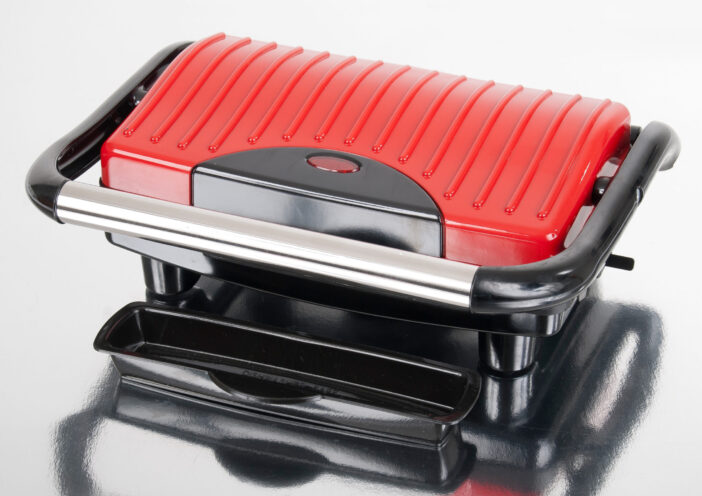
After diving into the best hacks for getting your panini grill looking new, it’s crucial to ensure that your efforts last. By maintaining your grill properly post-clean, you’ll extend its lifespan and enjoy consistent, delicious sandwiches. Let’s keep the momentum going with how to dry and reassemble your grill correctly.
Drying Your Grill Thoroughly
First things first, let’s talk about drying. Why? Because moisture is the enemy of longevity when it comes to kitchen appliances. Here are your steps for thorough drying:
- Wipe It Down: Start by using a clean, dry cloth or paper towel to wipe away any remaining moisture. This includes the grilling surface, the exterior, and any nooks where water might hide.
- Air It Out: Even after wiping, moisture can lurk unseen. Open the grill and leave it in a well-ventilated area or near a fan to air dry completely. This step can’t be rushed, but it’s worth the wait.
- Check the Drip Tray: If your model has a removable drip tray, take it out and wipe it down before setting it aside to air dry separately.
Drying is simple but key. A thoroughly dried grill is a rust-resistant grill, ensuring it’s ready for your next grilling session.
Reassembling Your Grill Correctly
Now onto reassembly, which is just as critical as cleaning for maintaining the integrity of your grill.
- Check the Manufacturer’s Instructions: Before reassembling, it’s always wise to consult the manufacturer’s guidelines. This ensures that you’re putting everything back in its proper place correctly.
- Replace the Plates: If you’ve removed the plates, make sure they’re completely dry before sliding or snapping them back into position. Align them according to the instructions, ensuring they sit flush against the grill.
- Reinsert the Drip Tray: Once dry, slide the drip tray back under the grill. It should fit snugly and without force.
- Give It a Final Look: After reassembling, do a quick overall inspection to ensure everything looks as it should. No parts should be loose or misaligned.
Ensuring your grill is dry and correctly reassembled not only guards against damage but also prepares you for hassle-free, delicious cooking next time. Taking these steps after each clean preserves your panini grill’s performance and longevity, letting you focus on what matters: crafting the perfect sandwich.


