5 Steps for How to Tuck Turkey Wings Before Roasting
Trussing and tucking turkey wings before roasting ensures even cooking, crispy skin, and a stable bird for carving, enhancing taste and presentation.
Oven-roasted turkey is certainly a meat entree that figures prominently in the winter holidays of Thanksgiving and Christmas, but there are plenty of reasons to cook and serve this dish throughout the year.
Turkey meat, especially turkey breast, has fewer calories and grams of fat than many other cuts of meat. It also comes packed with nutrients, including valuable minerals like magnesium, which is instrumental in supporting muscle functional general energy production.
But before you can start digging into healthy turkey meat, you must know how to correctly prepare it for cooking — which involves trussing and learning how to put turkey wings behind back.
Disclosure: As an Amazon Associate, this site earns from qualifying purchases. Thank you!
Why Do You Truss Turkey Before Cooking?
Trussing the turkey is a phrase used to describe the process of tying the wings and legs of the turkey up in order to prepare it for roasting. Trussing transforms the turkey into a more compact, collective shape.
This makes the turkey easier to handle when putting it in and taking it out of the oven, but there are other practical reasons to do this. Trying up the legs near the breast side helps even out the cooking, preventing the breast meat from overcooking while the legs become undercooked.
It also helps with air and heat circulation, ensuring that more parts of the turkey finish with deliciously crispy skin and tender meat.
How to Truss Turkey
How to Close the Neck Flap on a Turkey
The first step to trussing a turkey is to close the neck flap.
Where is the Neck on a Turkey?
When you buy a turkey, you will notice a long, loose cavity at the front of the bird. Most turkeys will have a paper-wrapped package of giblets, which includes the actual neck.
The USDA food safety website states that it is food-safe to leave this paper (but not if it is plastic) wrapped package inside the turkey while you cook. That said, for the best turkey roasting experience, you will want to remove this package and use the giblets for something like the making of gravy.
In some turkeys, this package might have been placed inside the turkey from the other end.
What Do You Do With the Neck Cavity?
After removing the packaged giblets, you can opt to loosely fill the now-empty neck cavity with stuffing or similar ingredients, such as chopped onions, mushrooms, and herbs.
Do not overstuff the turkey cavity as these inner foods will expand and the turkey meat itself shrinks some during the cooking process. Overly stuffing your turkey can result in a slight food explosion.
How Do You Secure the Neck Cavity?
After filling (or not filling) the neck cavity, you will pull the neck flap securely over the back of the turkey (the breast should be facing down along with the wings opening downwards).
Take a thin wooden skewer and pierce through the turkey skin on either side of the neck flap, securing the neck flap in place.
You can also buy specialty skewers called “trussing pins” that are designed specifically for securing parts of the turkey like the neck flap.
How Do You Truss Turkey Wings?
The second big step of trussing a turkey is to truss the turkey wings. Flip the turkey over so that the breast now faces up.
There are different techniques for trussing a whole turkey, but if you are just trussing the turkey wings, take a cut of kitchen twine and wrap it around the chest and each turkey wing, securely tying the turkey wings into the shoulders and snugly against the breast.
How Do You Tuck Turkey Wings Back?
Note that you do not have to tie the turkey wings with kitchen twine for trussing, an alternative method is to learn how to put turkey wings behind back.
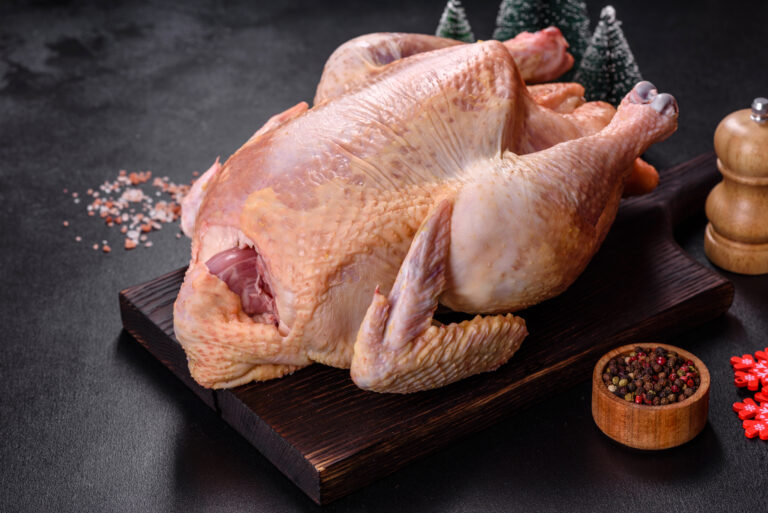
Start with taking one wing into your hand, lift the corresponding side of the turkey up a few inches, and then push the wing beneath the turkey’s back. Do the same thing to the other side of the turkey.
Do You Have to Tuck the Wings Under On a Turkey?
You do not have to tuck the wings under a turkey. Tucking the wings under a turkey serves three purposes.
First, presentation. After you take your turkey out of the oven, a trussed and tucked turkey will make for nice photographs prior to the carving stage.
The second reason for tucking wings under a turkey is for taste preference. Keeping the turkey legs secured into the turkey body prevents them from overcooking, ensuring an overall more evenly roasted turkey.
The final reason to tuck turkey wings under a turkey is for carving convenience. Tucking the wings back creates a flatter surface which works to stabilize the whole of the turkey when it comes time to bring out the knife and cut into the breast.
How Do You Tie the Turkey Legs?
The final step to trussing a turkey and preparing it for roasting is to tie each turkey leg. Turn the whole of the turkey (or reposition yourself), so that the opening of the chest cavity faces you. This is the rear end of the bird.
Cut and have ready a long piece of kitchen twine. Next, grab both legs and bring them together, holding them with one hand.
With the other hand, take the very middle of the kitchen twine and wrap it underneath and then around the legs. Wrap the kitchen twine several times until they are secured together.
After securing the legs together with kitchen twine, you have two options for finishing the trussing step. You can cut the twine here and leave it with just the legs tied together.
Or you can take the two ends opposite ends of the twine and wrap them over the tucked turkey wings, around the front of the bird in an “X” formation; bring the twine back and tie the ends again around the turkey legs.
This secondary option helps to keep tucked turkey wings more secure in place and works to make the whole of the turkey more compact for an even more aesthetically-pleasing final result.
What if I Don’t Have Kitchen Twine to Truss My Turkey?
Kitchen twine is especially useful for trussing a turkey, but it is not necessary. A common alternative to using kitchen twine is unflavored dental loss.
Unflavored dental floss will securely hold a turkey together just as well as kitchen twine and it can be a bit easier to find.
Kitchen twine also has several different names. Some will refer to it as butcher’s twine. Here, you can use any type of twine that comes as a clean, natural-colored cotton kitchen string. The primary thing to look out for is dyes.
You do not want to use any dyed string or twine as those colors and chemicals can leak into your meat and cause upset digestion.
What is Spatchcocking a Turkey?
In lieu of trussing up your turkey and roasting it traditionally, you can do what is called a spatchcocked or butterflied turkey.
A spatchcocked turkey is when you remove the backbone from the turkey and prepare it for roasting by lying it completely open with the wings spread out. Think of taking a book, opening it up, and lying it down so that the two sides sprawl open away from the spine — that’s how a spatchcocked turkey looks as you put it in the oven.
In a way, it is the exact opposite of trussing a turkey and has the effect of hastening the roasting time.

